Showing posts with label Tips/Techniques. Show all posts

Thursday, April 16, 2015

Hello Quilting Room!

I was going to do a WIP Wednesday post yesterday but didn't get my act together so I'll try again today with more of a PIP post - Plans In Progress - starting with my design wall.
Someone in the house has decided that this wall is great fun to jump up on. A furry little someone who looks rather angelic at the moment...
Elsa has had a big day so far. There were two rabbits dining on grass near our family room windows for about an hour this morning and she was going crazy hopping from window to futon to chair to the other window watching. Then my cleaning friend arrived and Elsa likes to supervise her work (except when the vacuum is running). She is so crashed that she gave a little "mewp" when she heard the camera click but that was it.
My cutting table is a big old mess and is item #1 on my To-Do List once this post is published. You can see the missing strips for Picnic in Serenade which will go back on the design wall and then I will get those strips assembled into a flimsy (item #2). 

I've pulled out the baggie containing my Faded Memories 4 patches and will be putting them up on the design wall to play around with layouts (item #3). I had forgotten the cute woven fabrics paired up with the regular cotton charms. Aren't they fun? I'm such a fan of 3 Sisters fabric lines.
Purple is the color for RSC15 in April so I'll pulled my purple scraps to make my bowtie blocks (item #4). Lots of busy prints here so I might need to cut into a few FQs this month. And, since I didn't get to my yellows in March I'll be doing those as well.

Somewhere along the line I read/heard about having books spiral bound for ease of use and I finally did it. And wow how I love it! I took these books to Office Max last week and paid just $4.29 a book... let's just say I've already started a stack of my most used quilt books for my next trip. The "Art Doodle Love" book was a birthday gift to myself but the binding was so tight I couldn't open it all the way to write in. They also add a clear protective sheet to protect the cover which you can't see in my picture and you can choose between white, black or clear for the coil. 

If you look back to the pic of my cutting table above you can see the acrylic recipe holder I use to hold my book for my current project open. It works fine, but if I leave it in there too long the book ends up getting bent out of shape. I'm one to forget the measurements or get a block sub unit flipped the wrong way so I'm constantly checking my books. Sometimes the simple things make me very happy!

Wednesday, March 5, 2014

WIP Wednesday: Where to Start

Last year I had settled into such a nice blogging rhythm/routine while being UFO focused... here it is already March and I still feel like I'm still winging it in 2014! I'm not complaining - it's just an observation. There are so many things I wanting to do (which is a good thing) and I'll keep playing around with how I structure my time until something clicks.

Let's start with some big news - my Sew Perfect Table has arrived! The last 2 nights my husband has been following our high school basketball teams in their playoffs so tonight is the night to get it assembled. The custom insert for Mr. Juki should arrive next week. Can you see a quilting marathon coming up?
I've been playing catch-up with my blocks for RSC14 and want to share a tip that I read about on Bonnie Hunter's blog awhile back. While I'm loving these specialty rulers I find it hard to stop them from slipping. Bonnie recommended using Nexus tape which has a nubbly texture on the back and it's clear so you can still read the markings. It really helps! I found mine at Wal-Mart next to the Band-Aids.
 I think I have one blue and one pink block to go and then I will be caught up.
I came across this yesterday and I think I'm going to go for it - how I can resist that title? Since I've learned that online challenges are very motivating to me in my quilting life I might as well give it a try with my other goals.
Image from http://www.whitehouseblackshutters.com/40-bags-in-40-days-2014/
I've started my list of 40 spots around the house to declutter and am shifting my March focus from the kitchen to our master bedroom because that's where our files are and I need to get our taxes done. Paper is my ultimate nemesis when it comes to organizing so I might as well dive in while I'm coming off my Olympics Organizathon high!

I'm including a gratuitous adorable kitten photo just because. Elsa has the silkiest fur and I think this picture really shows it off. Just look at that plume of a tail! I think she had just concluded her post breakfast bath judging by the ruffles on her side.
Have a great Wednesday everyone~

Wednesday, February 5, 2014

Plus = Value

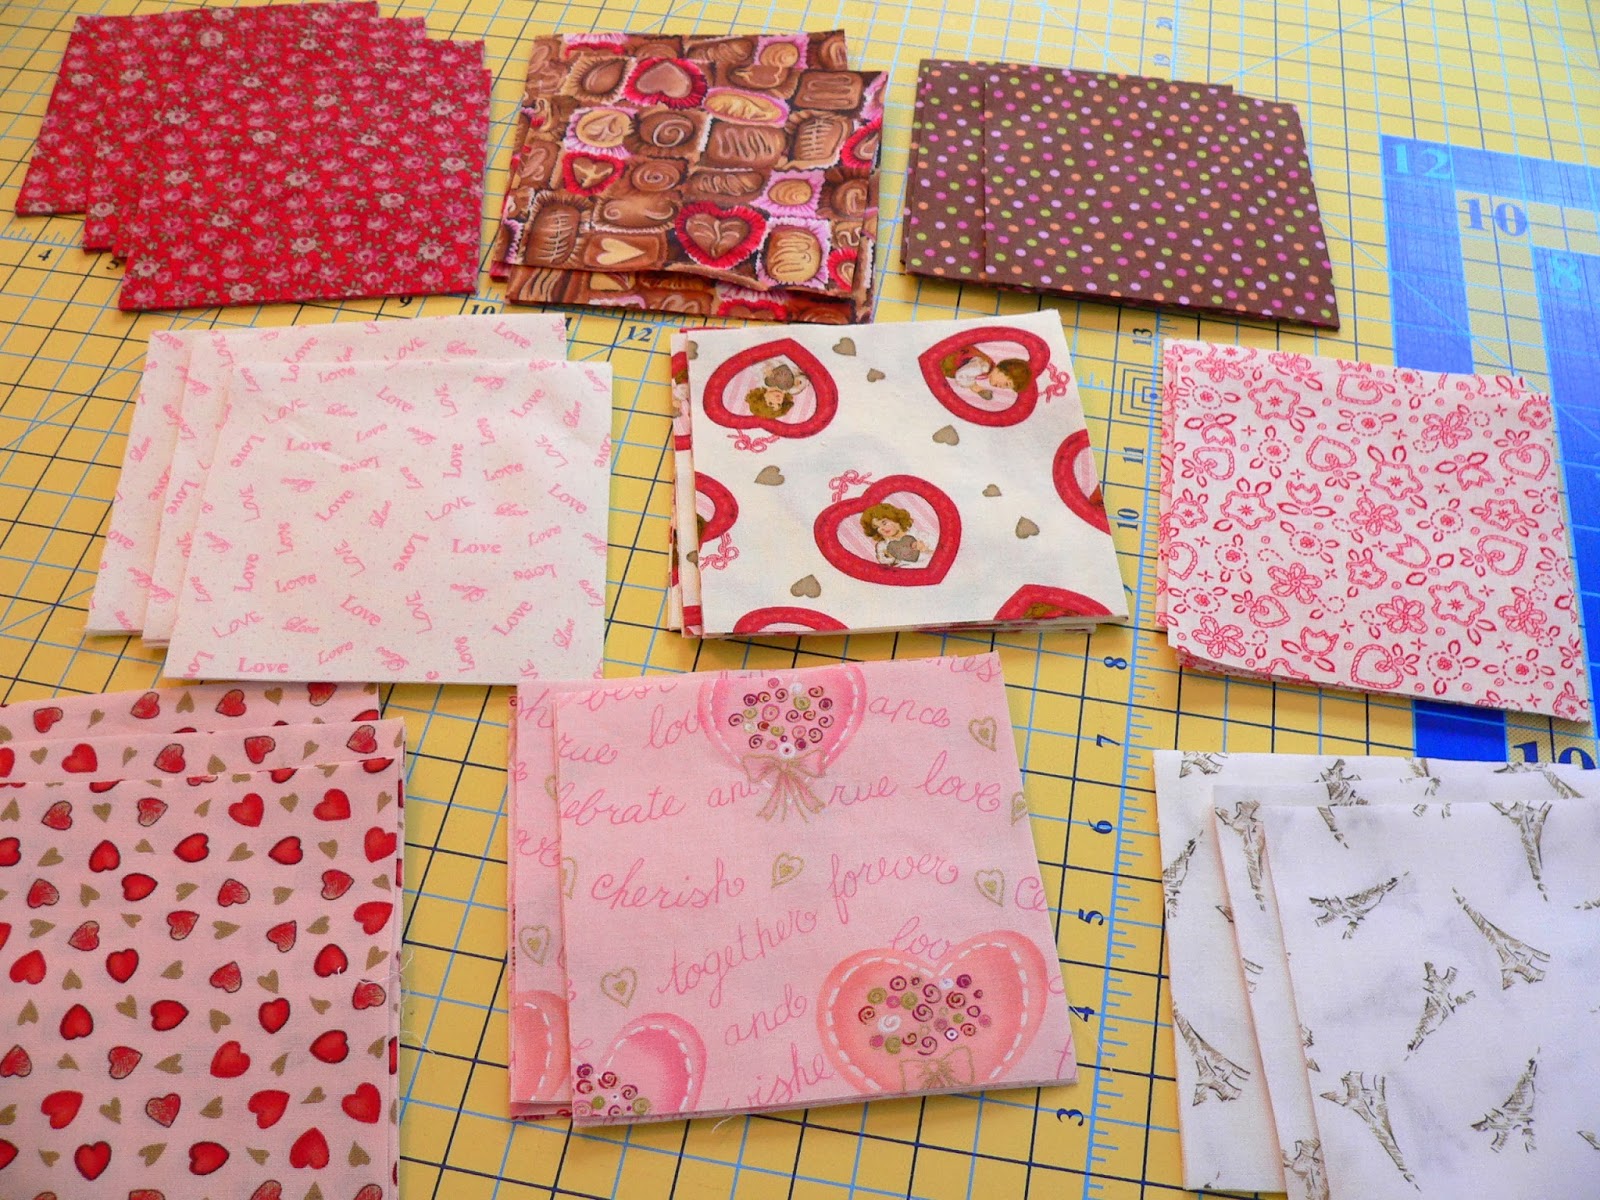
Yesterday I finished cutting the squares for my Valentine's Plus quilt, cleared my entire design wall and started laying out the squares. This morning I spent another two hours working on it. I'm following Jeni Baker's wonderful tutorial found HERE at her blog In Color Order so I'm using 4.5" blocks (320 in total cut from 20 FQs).

My starter set of fabrics for this quilt is a set of 11 FQs of an early Sandy Gervais line that I won in a giveaway years ago. It is a really nice mix of fun prints but the range of colors is quite limited with 6 medium value prints, 4 darks and only 1 light.
So I turned to my stash in search of some variety and some much needed lights!  I wanted to use the chocolates print so I added the brown polka dot and the Eiffel tower print to support the brown tones. I couldn't have a Valentine's Day quilt without a little Robyn Pandolph so I added the mini roses print on red.
Then I hooked up my iPhone to my speakers, turned on my audiobook and started in. 16 rows across and 19 rows down needed to be filled.
By the time I got to this point this morning my mind was in a muddle! I have never laid out a quilt like this before... and it is exhilarating, challenging and a bit frustrating too. The top half was easy but it definitely got more difficult the further down I went. I want a random look of not only fabrics but values. I can't tell you how happy I was for those browns to break up all the dark reds.

You can tell by the empty spots that I'm going to be cutting some more lights. 14 more squares from 4 of my light fabrics. Look at what I have left on my cutting table - lots of mediums and a few dark squares. Since my mediums are all basically the same shade of pink they didn't play very together in this layout.

Yesterday I was talking with Sara who blogs at My Sewing Room via email and she mentioned using a black & white photo image to check value. I used to do this while exploring watercolor quilting techniques years ago. What perfect timing - thanks Sara for the tip!
There are two areas I'd like to improve - the left middle and the lower right. I'm pretty happy with the rest. I'll be leaving the squares up on my wall for a few days tweaking things before I start sewing them together. That will be the easy part on this fun quilt!

I'm linking up to WIP Wednesday@Freshly Pieced and Fabric Frenzy Friday@Fort Worth Fabric Studio.

Thursday, February 21, 2013

Changing Old Habits

For my 1st seven years of quilting I was addicted to steam. My Rowenta iron was always full of water and ready to go! I am so impressed when I take out a quilt top now how those seams are still perfectly FLAT! I never used starch, always steam.

When I started quilting again in late September I quit using steam. I think my Rowenta had been dropped one time too many as it started spitting and occasionally spewing gunky water where I didn't care to have it. I cleaned it, but think it was too late.

I read raves about Mary Ellen's Best Press and how using a spray bottle of water was better than steam. I have both handy and use them on occasion. Other than ironing fabric for a NewFO (which doesn't happen a lot around here!) I'm not sure exactly when to use to use starch.

Just before Christmas my Rowenta started smelling like it was burning. I didn't have a lot of time to decide on a new iron so went with a mid-level $$ Black & Decker Digital Advantage. I don't love it like my Rowenta, but I like it fine. I use it mostly dry, but will bust out the steam when needed. Mainly to press a quilt top before sandwiching it. And, I'm obeying it when I get the CLEAN message on the display!

I also sewed over pins ALL the time. My Pfaff never seemed to mind, I never broke a needle and rarely bent a pin. I like to use the extra fine pins so that might have helped. Both Jukis are not so pin friendly...
so I am trying to remove my pins as I sew up to them but I am finding that habit much harder to break than my steam habit. Having to pack up one of these machines for a service call due to a pin bit or needle tip somewhere it doesn't belong scares the you-know-what out of me!
Today's tactic.

Are you addicted to steam, a fan of starch or do you sew over pins? Do tell! I'm linking up at...
Live A Colorful Life

Sunday, February 17, 2013

Good Reads and Waste Triangles

My cold is getting the best of me. Last night I went to bed early with a book and stayed in bed this morning with Tucker by my side finishing it. "The Unlikely Pilgrimage of Harold Fry" by Rachel Joyce was a charming book. It started out slowly but with each chapter the characters were brought to life and I was totally engaged. I think it will stay with me for awhile and remind me of how fragile life is but also how joyful it can be if you are able to reconnect and forgive.

This is the 2nd book this month that I've really loved. The 1st was "Love Anthony" by Lisa Genova. I adored her debut book "Still Alice" which depicted a woman's decline with Alzheimer's from her point of view and is to me an unforgettable book. "Love Anthony" is about marriage, fidelity and Autism. I found the parts of the book written from the little boy's point of view to be amazing. Based upon my experiences with friends who have autistic children it made perfect sense as to how the world may appear to a severely autistic child.

As I was cleaning my quilting room last week I was happy to find that the waste triangles from my Thimbleberries tree skirt are just what I need for one of my Christmas stockings! I was able to trim these into perfect 3.5" HSTs using a Triangle Square Up Ruler by Quilt in a Day.
I came across this ruler in my storage tray last month while making my Birds in the Air Blocks for RSC13. The simple markings made it really easy to use. Later, while browsing the internet for more info about the ruler, I found a video and was blown away by this simple concept...
Trimming HSTs before pressing them open - WHAT??? How have I been quilting since 2002 and NOT have known this!!!
It sure makes quick work of trimming HSTs! I don't throw my trimmed dog ears over my shoulder like Eleanor Burns does (just so you know). I'm thinking mug rugs for FMQ practice with the leftovers from the stocking.
In the spirit of new discovery, I've decided to break out another ruler that I bought once and have never used for the rest of the HSTs on top of the fabrics I'm considering.
Most of the time when I make HSTs they are totally scrappy so this method doesn't work but in this case I'll cut a strip from 2 of these fabrics and give it a go. I'll let you how I liked it later in the week!